22 Android Secrets Google Buried in Settings (Phone Companies Hate #7)
Android phones are packed with hidden gems, powerful features tucked away in settings that most users never discover. From better privacy controls to game-changing performance boosts, these buried features can radically improve
How you use your device. Imagine being able to lock down your most sensitive apps, gain extra hours of battery life, or easily share files without compromising security—without even needing to install a single new app.
In this article, we’re unlocking 22 Android secrets that Google buried deep in your settings. These aren’t just minor tweaks—they’re actionable, real-world upgrades for your everyday phone experience. Whether you’re looking to boost your privacy, save battery, or simply get more out of your phone, we’ve got the tips you need to take your device to the next level.
Ready to discover the Android tricks that phone companies hope you’ll never find? Let’s dive into these settings and start unlocking the power hidden in your device!
Lock Down Apps with Private Space (Android 15)
Want a vault for your most sensitive apps that actually disappears them from view? Private Space in Android 15 creates a separate, hidden profile that you unlock with a second factor (PIN, pattern, or biometric) in addition to your device lock. When locked, apps in this space are virtually invisible—they vanish from your launcher, recents, notifications, and even Settings searches.
To turn it on: Settings ▸ Security & privacy ▸ Private space. Choose a separate lock for stronger isolation, then move in anything you don’t want visible on your main profile—banking, health, dating, authenticator, or work apps. For extra separation, you can even tie the space to a different Google Account, keeping Play Store history, autofill, and sync distinct.
Because Private Space is implemented as a separate user profile, those apps are paused when locked—no background activity, no notifications, no accidental pop-ups in meetings.
Two pro tips:
(1) keep your Private Space lock different from your device lock;
(2) add only the minimum necessary apps to reduce update noise when you unlock.
This is one of the most powerful android privacy settings you can enable and one of the best hidden android settings for real-world protection.
See Who Touched Your Data: Privacy Dashboard

If you’ve ever wondered which app pinged your microphone, camera, or location—and when—Privacy Dashboard gives you a timestamped audit trail. Go to Settings ▸ Security & privacy ▸ Privacy dashboard. Pick a permission (for example, Location) to see which apps accessed it and at what time in the last 24 hours, and on some devices even longer.
Tap any app in the list to jump straight into its permissions and revoke or downgrade access, such as switching from “Allow all the time” to “Allow only while using the app.” This turns guesswork into a reliable permission audit: if a flashlight app checked your location at 2 a.m., you’ll spot it immediately and shut it down.
Combine this with Android’s privacy indicators—status bar dots for mic and camera—to confirm activity in real time, then use the Dashboard to make the fix permanent. It’s simple, built-in, and a must-use among android settings secrets.
Auto-Reset App Permissions You Don’t Use
Dormant apps shouldn’t keep a key to your data. Since Android 11, the system automatically resets sensitive runtime permissions—like location, contacts, or sensor access—for apps you haven’t opened in a few months. The next time the app launches, it must ask again, as if you had manually denied its access.
This background reset is one of the easiest ways to revoke app permissions without lifting a finger. To manage it per app, head to Settings ▸ Apps ▸ See all apps ▸ [App] ▸ Permissions and ensure “Remove permissions if app isn’t used” (or “Pause app activity if unused”) is turned on.
Leave it enabled for nearly everything. The exceptions are apps you know must run in the background, like a trusted automation tool or device locator. For parents or IT admins, this safeguard helps reduce risk from forgotten apps, improving privacy month after month without extra work.
Hibernate Apps to Save Space (No Uninstalls)
Need storage back without losing your app setups? App Hibernation, introduced in Android 12, suspends rarely used apps. It clears temporary files, resets sensitive permissions, and blocks background activity, but it keeps the app and your data so you can restore it later with a tap. Think of it as a reversible “deep sleep,” not a delete.
Android may auto-hibernate unused apps after a period of inactivity, but you can also force it: Settings ▸ Apps ▸ See all apps ▸ [App] and look for “Unused app settings” or “Remove permissions and free up space”. On newer versions, this may appear as “Pause app activity if unused.”
Hibernation is perfect for big games you only play occasionally, seasonal shopping apps, or experimental tools you don’t want to uninstall completely. Unlike deleting, it retains your data and avoids the hassle of reconfiguring. Pair it with Google Play’s Auto-Archive and you can keep icons and settings while still reclaiming space. This is one of the easiest ways to free up storage while staying flexible.
Extreme Battery Saver: Squeeze Up to 72 Hours
When you’re down to single digits and a long trip ahead, Extreme Battery Saver is the feature that can keep you connected. On Pixel 3 and newer devices, find it under Settings ▸ Battery ▸ Battery Saver ▸ Extreme Battery Saver. Many other brands offer similar “Ultra” or “Max” modes.
Once activated, Android pauses most apps, slows background processes, and cuts down on sync. You get to choose an Essential apps list—typically calls, messages, navigation, or authentication apps—that continue working while everything else is frozen. Google notes this mode can stretch an “all-day” battery to as much as 72 hours, depending on conditions.
There are trade-offs. Animations may stutter, notifications for paused apps won’t come through until opened, and performance is tuned for endurance rather than speed. The key is in configuration: keep your whitelist minimal and favor lightweight tools. For best results, some users follow a tiered routine: enable regular Battery Saver at 30%, then flip to Extreme at 15% to lock in the longest runtime.
If your phone maker has its own version, the principles are the same—restrict background apps, whitelist essentials, and scale down performance. This setting remains the most effective android battery saver trick when you need to extend battery life beyond normal limits.
Use Photo Picker to Share Only Specific Photos

Granting an app full access to your gallery is overkill. The system Photo Picker lets you share only the exact images or videos you select—nothing else. That means a social app, a delivery service, or a photo editor can work on the files you choose without browsing the rest of your camera roll, albums, or cloud libraries. It’s built into Android 13 and newer, so you don’t need to install anything or trust each app’s custom picker.
How to use it:
- Open the app that’s asking for photos. When prompted, choose “Selected photos” instead of “Allow all photos.”
- Tap to pick specific items. You can adjust selection later if the app supports re-prompting.
- If an app already had broad access, go to Settings ▸ Apps ▸ See all apps ▸ [App] ▸ Permissions ▸ Photos & videos and switch to “Selected photos”.
Why it’s better: Apps with broad Files/Photos access can scan metadata and thumbnails from your whole library. The Photo Picker prevents that by exposing only the items you approved, and only for that request. It’s a practical upgrade to your android privacy settings that doesn’t break workflows.
Pro tips:
For messaging, pick the image from within the conversation when the app triggers the system picker—don’t pre-grant the whole library.
If you often post from a specific album (e.g., “Listings” or “Portfolio”), keep those images in a dedicated folder so selection is quick.
On devices with cloud-backed galleries, the picker can surface cloud items without giving the app blanket cloud access.
Small habit change, huge payoff: use the Photo Picker every time and treat “Allow all photos” as the rare exception. (Keywords: android privacy settings; photo picker.
Silence Junk by Requiring Notification Permission
Before Android 13, many apps could start bombarding you the moment they launched. Now, notifications are a runtime permission: apps must ask first. That single prompt is your best chance to block noise at the source and keep your lock screen calm.
Set the default stance: When you install or first open an app, choose “Don’t allow” unless you truly need real-time alerts. You can always reverse it later. This upfront decision prevents the usual cascade of marketing pings, auto-follow suggestions, and “rate us” nags.
Audit what slipped through:
Go to Settings ▸ Notifications ▸ App notifications.
Review the list and toggle off anything that isn’t time-critical.
For apps you keep enabled, dive into their in-app notification categories and mute promotions, “tips,” and “suggested” updates while keeping essentials (e.g., direct messages, rides, deliveries).
Power moves to block notifications on Android (the right way):
Silence by default, then whitelist a handful of mission-critical apps.
Convert alerts to summaries where supported (e.g., only mentions or high-priority channels).
Disable badges for low-value apps to reduce compulsion loops.
Use Do Not Disturb schedules for sleep and deep work; allow exceptions like calls from starred contacts.
The result is a quieter phone, longer attention spans, and better battery life—because fewer wakeups means less background churn. Treat every new app’s prompt like a gate: if it doesn’t help you in real time, it doesn’t need a pass. (Keywords: block notifications android; android 13 notifications.)
Clipboard Privacy: Auto-Clear & Preview Controls
Copying passwords, one-time codes, or addresses leaves traces. Since Android 13, the system shows a small clipboard preview toast when you copy and can hide sensitive content so other apps can’t silently read it. Even better, the clipboard auto-clears after about an hour, which shrinks the window for accidental pastes or background reads by misbehaving apps.
Make it work for you:
When you copy sensitive info (passwords, 2FA codes, bank details), wait for the preview toast to confirm it’s captured, then move on—no need to leave data sitting in memory all day.
If you need a longer-lived history for productivity, open your keyboard’s clipboard manager (for example, Gboard ▸ Clipboard) and pin only non-sensitive snippets. Unpin regularly.
To reduce exposure, avoid copying entire documents; copy only the fragment you need for the next action.
Settings to check:
Gboard ▸ Clipboard: toggle the clipboard manager, enable/disable smart suggestions, and clear history.
Settings ▸ Privacy (or Security & privacy) on many phones surfaces clipboard controls and privacy indicators; keep them on for visibility.
Everyday workflows:
For one-time passcodes, rely on auto-fill or code suggestions instead of manual copy.
For addresses, paste once into maps or messages, then let the auto-clear handle cleanup.
For multi-step tasks, pin a temporary snippet, finish the task, and clear the pin.
These habits, combined with Android’s built-in safeguards, significantly reduce accidental leaks while keeping everyday copy-paste fast and convenient. (Keywords: android privacy settings; clipboard.)
Quick Share (ex-Nearby Share): Faster, Safer Sharing
Benefit: Move files to phones, tablets, Chromebooks, and supported PCs in seconds—without blasting your data to everyone nearby.
What changed: Google and Samsung unified sharing under the Quick Share name (the evolution of Nearby Share). You get the same simple tap-to-send flow with clearer privacy controls and better device discovery.
Path: Settings ▸ Google ▸ Devices & sharing ▸ Quick Share.
Set your visibility wisely:
Everyone: most convenient at events, but limit it to a short window.
Contacts: the best default—only people in your Google Contacts can see you.
Your devices: safest for solo use; perfect for phone↔laptop transfers.
How it works: Quick Share uses Bluetooth to establish a handshake and Wi-Fi Direct for fast, offline transfers. That’s why it’s quick even without internet. From any app’s share sheet, tap Quick Share, pick a recipient, and confirm on the other device. Files stay local, end-to-end on your own radios.
Power moves:
Nickname your device so it’s obvious which phone or laptop is yours.
Toggle “Allow everyone” only when needed; set a time-limited visibility if offered by your device.
If your transfers stall, briefly toggle Airplane mode off/on, then ensure Bluetooth and Wi-Fi are back on—this resets radios without killing your flow.
On multi-device desks, use Your devices to keep coworkers’ pop-ups out of your list.
Why it’s safer: Only recipients you approve can receive, and your discovery setting prevents drive-by spam. For most people, Contacts strikes the right balance. (Keywords: quick share android; share files offline.)
Find Lost Stuff with the New Find My Device Network
Benefit: Track down misplaced phones, tablets, earbuds, and Bluetooth tags—even when they’re not connected to your Wi-Fi.
What’s new: The upgraded Find My Device taps a crowdsourced network of over a billion Android devices. When your item goes missing, nearby Android phones can securely report its Bluetooth presence to the cloud, helping you see an updated location.
Path: Settings ▸ Google ▸ Find My Device → enable “Allow this device to be found.” On supported phones you can also enable offline finding options.
Supported gear: Phones and tablets with Android 9+, supported earbuds, and third-party Bluetooth tags designed for the network. You’ll see last known locations, can play a sound, and for phones you can Secure device or Erase if necessary.
Set it up right:
Verify Google Account and Location are on; enable Bluetooth for offline network pings.
Add Recovery options (alternate email/number) so locks and alerts reach you.
For tags/earbuds, pair them once, then check they appear in Find My Device.
Privacy and safety: Location reports are encrypted end-to-end, and you control whether your phone participates in the network. If you misplace a phone, remember: the device must power on or periodically advertise via Bluetooth; a fully depleted battery can’t beacon.
Pro tip: Add a lock screen message (“If found, call…”) and turn on Find nearby when you’re close—your phone will act like a Geiger counter for your tag. (Keywords: find my device; android tracker network.)
Passkeys in Google Password Manager (Ditch Passwords)
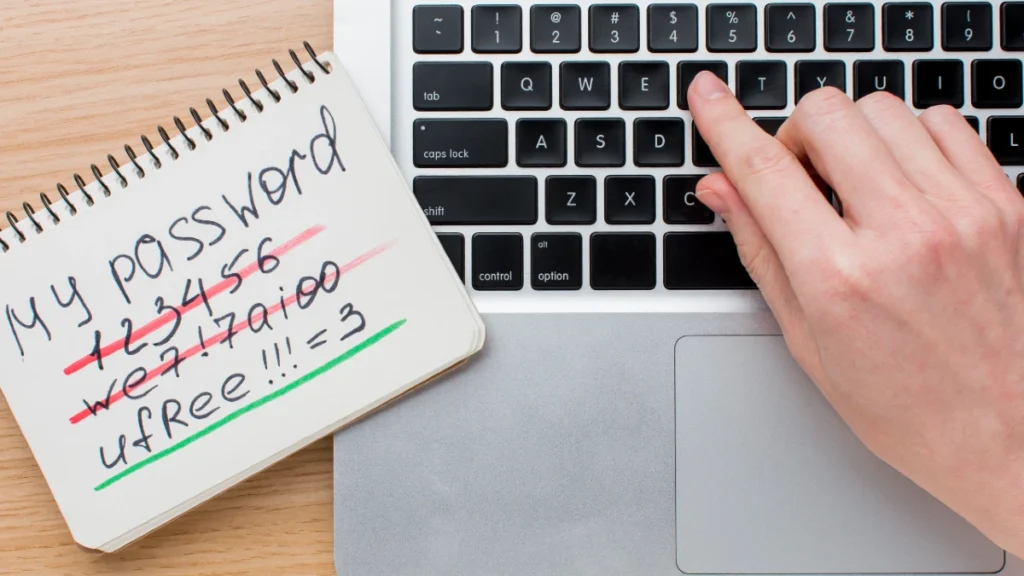
Benefit: Sign in with your fingerprint, face, or PIN—no passwords to phish, reuse, or forget.
How it works: Passkeys replace passwords with public-key cryptography. Your private key lives on your phone, unlocked by your screen lock. Services get only a public key, so there’s nothing reusable to steal in a breach. Security teams at Google and the FIDO Alliance emphasize that passkeys are phishing-resistant by design.
Where to manage: Settings ▸ Google ▸ Password Manager. There you’ll find your Passkeys list, plus options for Auto sign-in and biometric prompts. Passkeys sync within your Google Account across signed-in devices, letting you approve logins on Android and in Chrome seamlessly.
How to use: Visit a supported app or site and choose “Use a passkey.” You’ll see your familiar device unlock screen. That’s it—no codes or SMS. If a site still requires a password, you can keep a traditional login in Google Password Manager while you wait for passkey support.
Best practices:
Keep a strong screen lock; it guards your private keys.
For shared devices, disable Auto sign-in or use a separate profile.
Add a backup device (another phone or a hardware security key) to avoid lockouts.
Why switch now: It’s faster than OTPs, safer than passwords, and already works in Chrome and many major apps. (Keywords: android passkeys; google password manager.)
Health Connect: Rule Your Health & Fitness Data

One private hub to control how your health and fitness apps share data—with per-type, per-app permissions you can actually understand.
What it is: Health Connect lets apps such as fitness trackers, running logs, sleep monitors, and nutrition diaries write to and read from a common store on your device. You decide exactly which data types move between which apps.
Where: On Android 14 and newer, go to Settings ▸ Security & privacy ▸ Privacy controls ▸ Health Connect. On older supported versions, install the app and open it from Settings or the launcher.
Granular control: Permissions are grouped by data type—Steps, Sleep, Heart rate, Body measurements, Nutrition, and more. For each app you can set Read, Write, Both, or No access. You can also pause an app’s access temporarily without ripping out its integration.
Practical setup:
- Pick a source of truth for each category (e.g., your watch app for steps and heart rate).
- Allow your favorite dashboard app to Read those categories.
- Give only the apps that capture data Write access; deny write to dashboards that don’t need it.
- Periodically open Health Connect’s Data & access screens and revoke apps you no longer use.
Privacy by default: Data stays on-device unless an app you authorize syncs it elsewhere. Because everything routes through one place, audits are simple and revocations are immediate. Result: cleaner graphs, fewer duplicates, and control that matches your goals. (Keywords: health connect android; fitness data privacy.)
Location Accuracy: Wi-Fi/Bluetooth Scanning Toggles
Better indoor positioning and faster location locks—without turning on full Wi-Fi or Bluetooth.
Path: Settings ▸ Location ▸ Location services ▸ Wi-Fi scanning and Bluetooth scanning.
What they do: Even with Wi-Fi or Bluetooth switched off, Android can scan nearby access points and beacons briefly to improve location accuracy. This helps maps find your place inside malls, airports, or dense urban areas where GPS alone struggles. It also speeds the first fix when you open a navigation app.
Privacy trade-off: Scanning reveals nearby infrastructure to the OS and can be used by apps with the right permissions to estimate location. If you’re traveling, working in sensitive areas, or just want a tighter privacy envelope, turn them off. For daily city life and turn-by-turn navigation, leave them on for smoother results.
Recommended approach:
Everyday use: keep both toggles on; the boost is real.
Privacy-sensitive moments: flip them off temporarily; location will still work via GPS, just slower and less precise indoors.
Battery note: the scans are short and power-efficient; the accuracy gain typically outweighs the minimal cost.
Quick test: With scanning on, open Maps in a large building and watch your blue dot snap to the correct floor area faster. With scanning off, expect a looser circle and slower lock. Make the call based on your needs. (Keywords: android location accuracy; wifi scanning.)
Randomized Wi-Fi MAC: Track Less, Roam Safer

Benefit: Stop public and enterprise networks from tracking your phone across venues by locking your Wi-Fi identity to randomized per-network MAC addresses.
Defaults: Since Android 10, most devices use a randomized MAC by default for each saved network. That means the coffee shop sees one identifier and your office sees another—harder to stitch a movement profile together.
Where to check: Connect or go to a saved network’s Network details screen and open Privacy (wording varies). You’ll see “Use randomized MAC” or “Use device MAC.” Confirm it’s set to randomized for public or retail Wi-Fi.
When to use device MAC: Some enterprise networks (especially with 802.1X or MAC filtering) require your hardware MAC for access. Your IT team may ask for it explicitly. Switch to device MAC only for those SSIDs; leave everything else randomized.
Tips for smooth roaming:
If you change the MAC mode, forget and re-add the network so credentials bind correctly.
Label sensitive networks with a note (“Device MAC required”) to avoid confusion later.
If a captive portal keeps looping, toggle between randomized and device MAC to test; some portals mishandle randomized addresses.
Bottom line: Randomization is a powerful wifi privacy control with almost zero downsides for home and public networks. Use it everywhere you can; reserve the hardware MAC for the few places that demand it. (Keywords: randomized mac android; wifi privacy.)
Emergency SOS & Safety Check: Prep Before You Need It
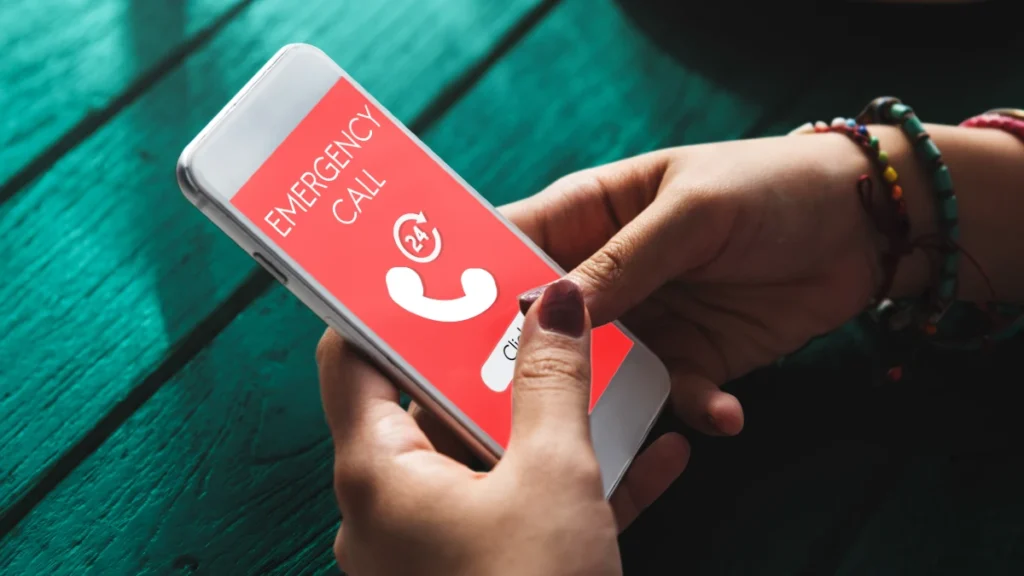
Benefit: In crises, seconds matter. Configure your phone to call for help, share your location, and prove what happened with minimal taps.
Set up Emergency SOS: Go to Settings ▸ Safety & emergency (or open the Personal Safety app). Turn on Emergency SOS and choose actions: call local emergency services, share real-time location with emergency contacts, record video, and play a loud alarm if desired. On many devices, rapidly pressing the power button triggers SOS. Test the gesture so muscle memory kicks in later.
Use Safety Check: Inside Personal Safety, schedule a Safety Check timer before risky commutes, late-night walks, or solo meetups. If you don’t confirm you’re OK when the timer ends, your phone auto-notifies your contacts and can share your location.
Prepare essentials:
Add emergency contacts, medical info, and critical conditions so responders see it on the lock screen.Enable Car crash detection if supported in your region.
Keep Location on for accurate sharing; SOS features may be limited in Airplane mode or when Battery Saver restricts background actions.
Real-world workflow: Trigger SOS, let the phone call or text your contacts, and keep the automatic recording running if enabled. If the situation de-escalates, cancel early and inform contacts.
Why this matters: These tools reduce panic steps under stress. Set them up once, practice the trigger, and you’ll have a silent partner when it counts. (Keywords: android emergency sos; safety check.)
Settings ▸ Accessibility ▸ Live Caption and toggle it on. Once activated, captions will automatically appear for any audio played through your phone’s speakers or connected devices.
Offline capability: The feature works without an internet connection, so you won’t need to worry about data usage or a stable Wi-Fi connection. Live Caption supports several languages, though the accuracy of captions can vary based on language and context.
Battery and network implications: Live Caption uses minimal resources, but it does use some of your phone’s processing power. However, the battery drain and network implications are negligible, making it an excellent tool for daily use.
Pro tip: You can toggle Live Caption on or off quickly using the volume panel. Just press the volume button and tap the Live Caption icon to turn it on or off.
Live Caption is a must-have accessibility feature for anyone who needs real-time captions without complex setup or apps. (Keywords: live caption android; accessibility.)
Record or Share Just One App (Partial Screen)
Benefit: Keep your screen recordings clean and private by sharing or recording only the specific app you need, rather than your entire screen.
What’s new: Android 15 introduces the ability to record or share just one app window, helping you maintain privacy and avoid accidentally showing notifications or other apps during your recording or live sharing. This is perfect for presentations, tutorials, or any time you need to share a focused, uncluttered view.
How it works:
- When you start a Screen Recorder or Screen Share, you will now have the option to select only one app to share or record, as opposed to capturing the full screen.
- Choose the App window option, and select the app you want to record or share. The rest of your screen will stay hidden, giving you full privacy.
Why it matters: The new app-only screen sharing feature minimizes distractions and reduces the risk of accidentally sharing sensitive information, like personal notifications, messages, or browser tabs. Whether you’re recording a tutorial or sharing a meeting presentation, you’ll have full control over what others can see.
Pro tip: If you’re recording a call or chat in an app, be sure to choose only the app window to maintain focus and avoid showing any unrelated notifications.
This is a privacy-focused enhancement that helps keep your content controlled and your experience seamless. (Keywords: android screen recording; share app window.)
Per-App Languages: Use Apps in Different Languages
Benefit: Per-App Language settings allow you to use different apps in multiple languages, making it ideal for bilingual users or those who need a specific language for certain apps while keeping others in a default language.
How it works: If you speak more than one language or prefer specific apps in a language other than your phone’s default, Android 13 and newer versions allow you to assign different languages to individual apps. For example, you can keep your phone system in English while setting WhatsApp to Spanish or your news app in French.
Path: Go to Settings ▸ System ▸ Languages & input ▸ App languages. There, you’ll find a list of apps that support language changes. Tap on the app, then choose the language you want to use.
Why it’s useful: This feature is perfect for users who work in multiple languages, have family members who speak different languages, or want to experience apps in their original languages. It can also help improve the usability of apps that might not have full support for your phone’s default language.
Pro tip: Pair this with Google Translate’s instant translation for apps that might still display content in a different language.
Who benefits: Anyone in a bilingual or multilingual environment, including families, professionals, and language learners, can benefit from this powerful setting. It enhances flexibility and usability without requiring complex app switching or setup.
Per-app language settings are a smart way to personalize your device for real-world needs. (Keywords: per-app language android; multilingual apps.)
One-Handed Mode: Big Phone, Small Reach
Benefit: One-handed mode is your solution when you’re juggling tasks or simply trying to use your large phone with just one hand. It makes your screen more accessible, allowing you to reach any corner of your display without stretching your thumb.
What it is: One-handed mode condenses your display, shifting it downward, so you can easily tap icons or buttons at the top of the screen. This is a lifesaver on devices with large screens, such as phablets or larger flagship models, where reaching the upper part of the screen with one hand can feel impossible.
How it works:
- Activate it by going to Settings ▸ Accessibility (or sometimes System ▸ Gestures depending on your device).
- Turn on One-handed mode, and you’ll see an option to enable the feature via a gesture, such as swiping down the home button or pressing the home button three times.
- Once activated, your screen will shrink to a more manageable size, typically about 4.5-5 inches in height, allowing you to access every part of the display.
When to use it: One-handed mode is useful for navigating your phone while holding it with one hand, especially during tasks like texting, web browsing, or watching videos. Whether you’re commuting or holding a coffee cup, this feature gives you more control with less effort.
Pro tip: If you have large hands, use One-handed mode as a convenience rather than a necessity. You can also adjust the size of the condensed screen for a more comfortable reach. This feature helps eliminate the awkward stretching or one-thumb typing that’s common with large smartphones.
One-handed mode ensures that even the biggest screens are easy to use in everyday situations. (Keywords: one-handed mode android; gestures.)
Data Saver & Per-App Unrestrict

Benefit: Save mobile data by limiting which apps use data in the background while still allowing the apps you need to function as usual. This is a great tool for users on limited data plans or those who want to reduce unnecessary data consumption.
What it is: Data Saver is a built-in feature that restricts background data use across all apps. It helps you cut down on data usage, especially when you’re away from Wi-Fi. Additionally, Android allows you to selectively unrestrict certain apps that you want to continue to use data in the background, like messaging or navigation apps.
How it works:
- To enable Data Saver, go to Settings ▸ Network & Internet ▸ Data Saver and toggle it on.
- Once enabled, apps will not use data unless you’re actively using them. However, some apps, like messaging or email apps, may still send and receive messages or emails even in Data Saver mode.
- To unrestrict a specific app, go to Settings ▸ Apps ▸ [App Name] ▸ Data usage and turn off Restrict app background data.
Why it’s useful: For those with limited mobile data or people traveling internationally, Data Saver ensures apps only use data when needed, preventing surprise charges. This feature helps you prioritize essential apps while reducing overall data consumption.
Pro tip: Use Data Saver during long commutes or when you’re near your data limit, but remember to unrestrict apps like maps or real-time weather, which need constant updates.
Data Saver helps manage mobile data use intelligently while ensuring your most important apps continue to function. (Keywords: data saver android; reduce data usage.)
Auto-Archive Unused Apps (Free Space, Keep Data)
Free up storage without losing app data or settings. Auto-Archive is a feature that automatically removes the app from your home screen but keeps all app data intact. This means you can instantly restore apps without losing progress or information.
What it is: Introduced in Android 12, Auto-Archive allows apps to be archived when you haven’t used them in a while. The app gets removed from your device, freeing up storage space, but all of your data remains safe. When you decide to use the app again, you can reinstall it instantly from the Play Store, and your settings, accounts, and data are restored.
How it works:
- To enable Auto-Archive, go to Settings ▸ Google ▸ Play Store ▸ Auto-archive apps and toggle it on.
- When enabled, Android automatically archives apps that you don’t use often. You’ll see the app icon grayed out, and you can tap it to reinstall.
- If the app is archived, it still takes up some space on your device, but its app data remains untouched.
Why it’s useful: This feature is perfect for people with limited storage or users who download apps for specific tasks but don’t need them all the time (e.g., travel apps, seasonal tools). Instead of uninstalling apps and losing all your data, Auto-Archive keeps everything intact and saves you from the hassle of reconfiguring apps when you need them again.
Pro tip: Keep Auto-Archive on for apps like games or one-time-use apps. This way, they won’t clutter your device but remain available when you need them, with no data loss.
Auto-Archive helps you manage storage space without the risk of losing app data, making it a great storage optimization tool. (Keywords: free up storage; archive apps android.)
Private Compute Core: On-Device AI, Kept Private

Benefit: Your phone can do more with AI without sending data to the cloud. Private Compute Core (PCC) enables sensitive AI features to run locally, preserving privacy while still providing intelligent features.
What it is: Android’s Private Compute Core (PCC) is a secure, isolated environment where sensitive AI features like Live Caption, Now Playing, and Smart Reply are processed. Unlike traditional cloud AI, the data remains on your device, reducing the risk of exposing private information to third-party servers.
How it works: The PCC operates within your phone’s secure hardware enclave, ensuring that all AI operations—like transcribing audio or suggesting replies—happen directly on your device. This keeps sensitive information such as audio clips or personal text messages private and secure. Additionally, because the data is processed locally, features like Live Caption work offline.
Where to check: To manage PCC features, head to Settings ▸ Apps ▸ Private Compute Services. This section provides details on which features are using the private compute capabilities, and you can toggle settings or disable specific features.
Why it’s useful: Privacy-first AI means your personal information, such as conversations or photos, is never sent out of your device. PCC ensures that your private data stays secure while still allowing powerful AI features to improve your Android experience.
Pro tip: Keep an eye on Private Compute Services for updates, as more features are being added that rely on on-device AI processing, ensuring greater privacy.
Private Compute Core allows you to enjoy advanced features with the peace of mind that your data is never leaving your device. (Keywords: private compute core; on-device AI.


